Integrating Thunkable (and Airtable) with the Python Web Playground
Setting Up Your Airtable and Python Playground Project
- Before starting with thunkable, follow the steps in the Learning Library lesson "Integrating Airtable with the Python Playground." There, you will create your own "cloud database" in Airtable and a Python project to control your robot.
- Once you've created your Airtable and Python Playground project, open them on your screen. You'll be referring to both pages as you build your Thunkable app.
Getting Started with Thunkable
- Visit Thunkable.com and create an account. Then create a new, blank project.
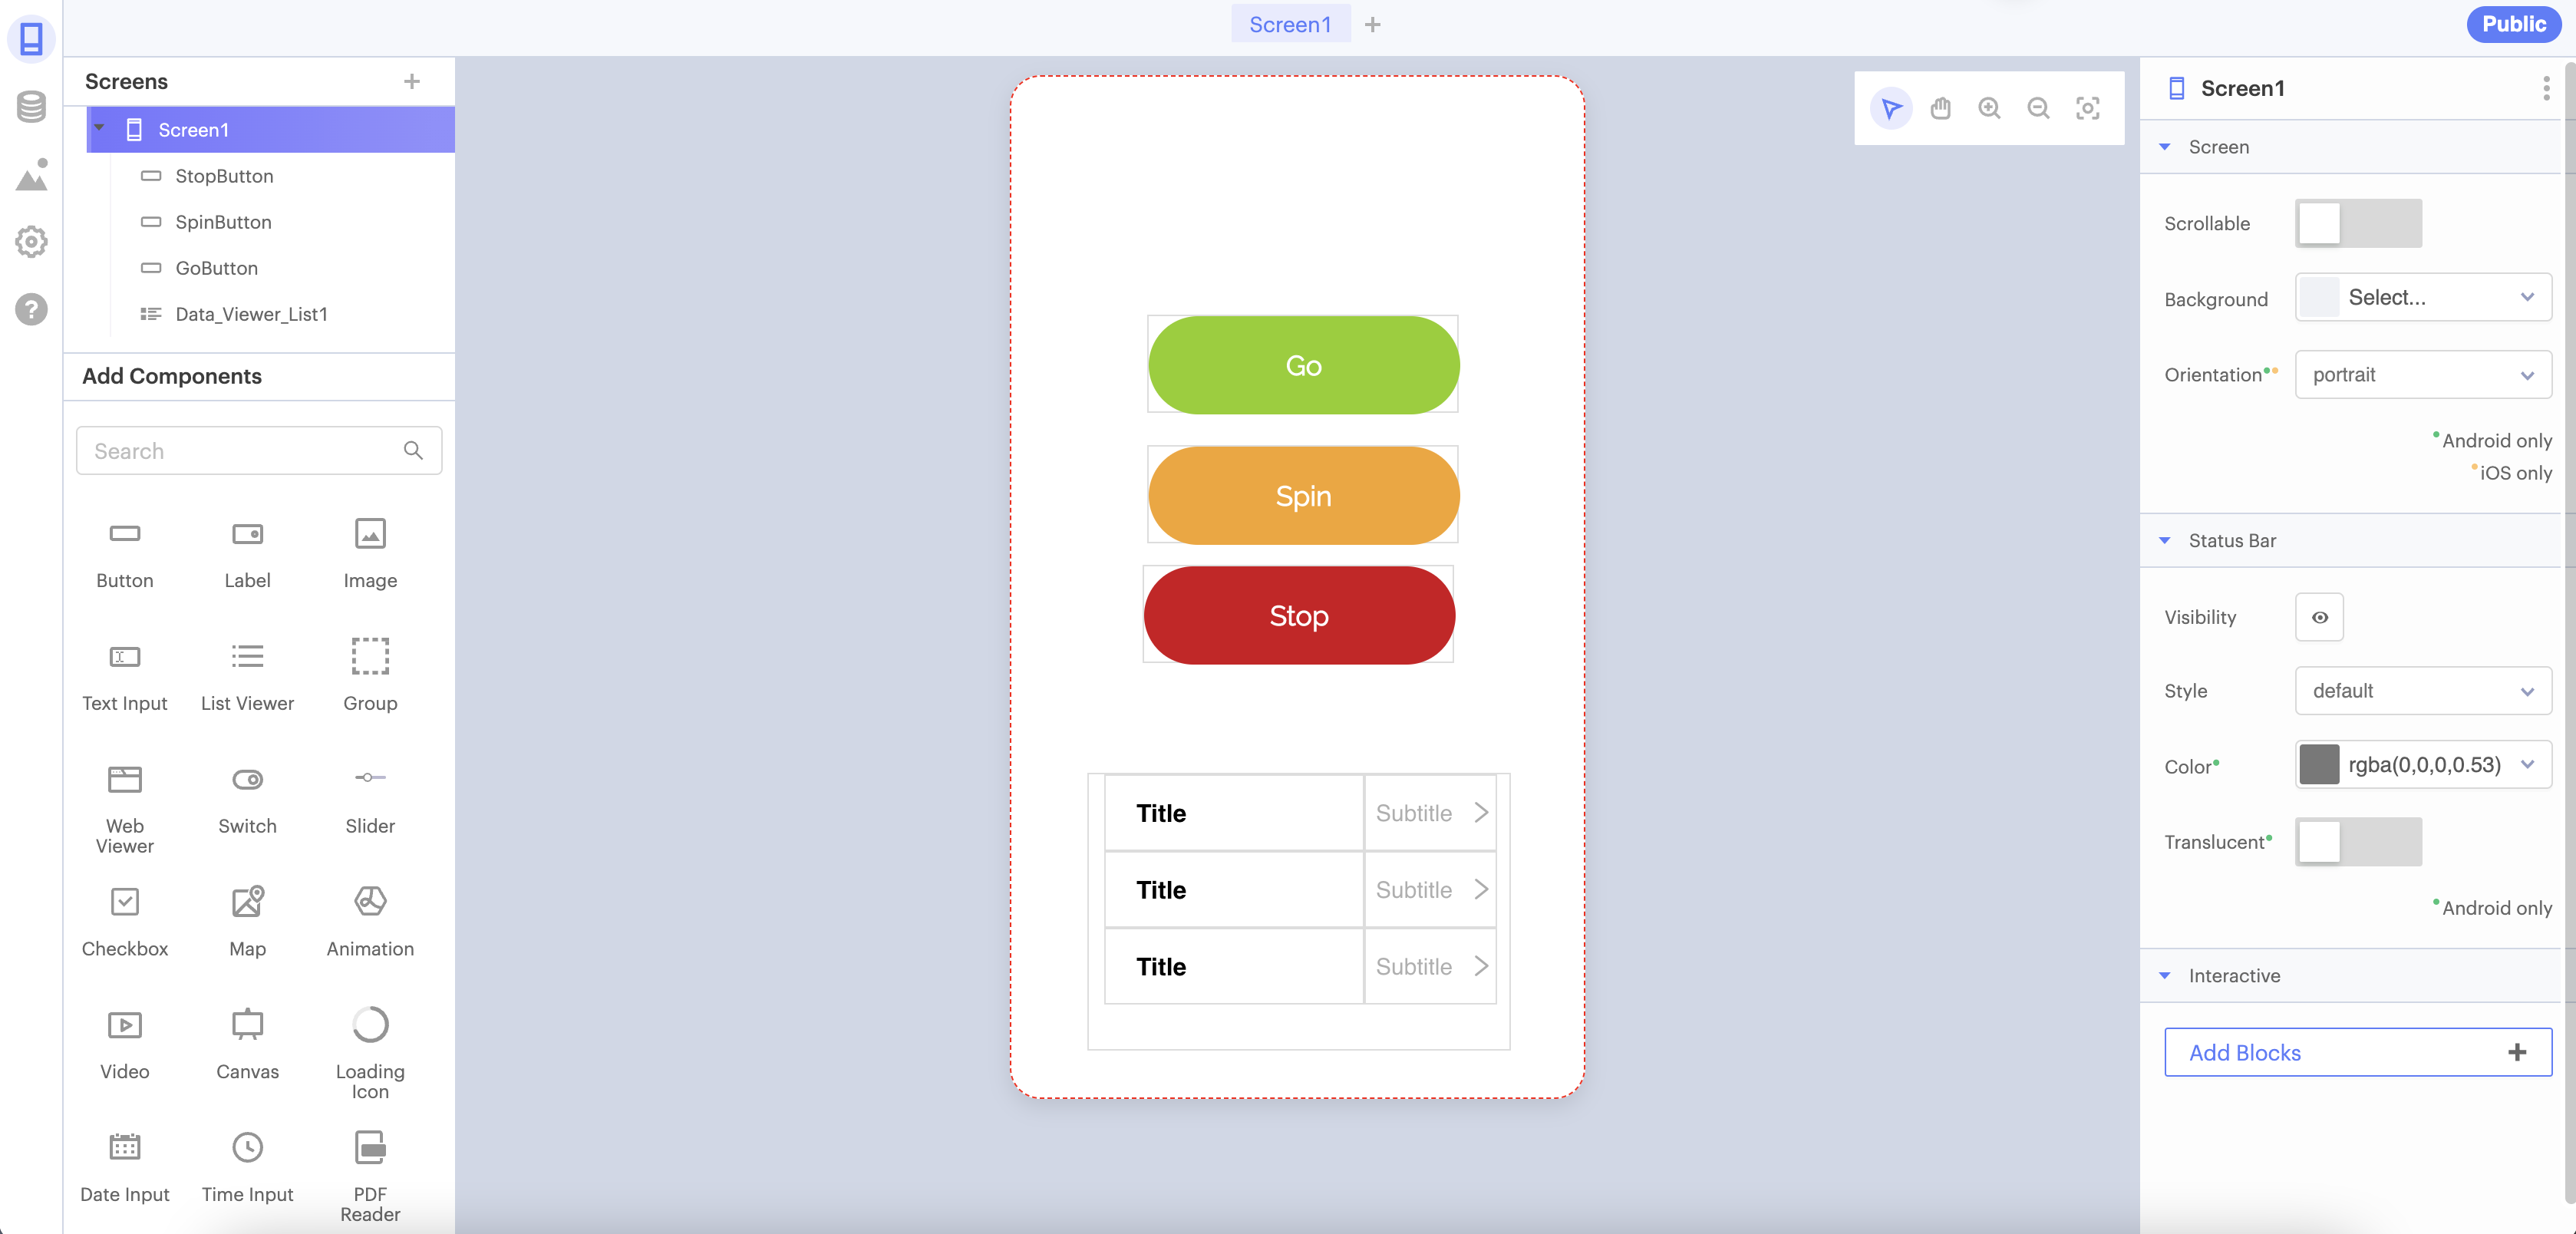
- Use the Design Elements on the left side of the page to drag out three buttons. Next, click each button and edit its data using the panel on the right side of the screen.
- Name the first button "GoButton" and give the button text "Go"
- Name the second button "SpinButton" and give the button text "Spin"
- Name the third button "StopButton" and give the button text "Stop"

- To the extreme left of the page, click on the Data Source icon. Click the plus icon next to the Data Source title to open the Your Data Sources dialog box.
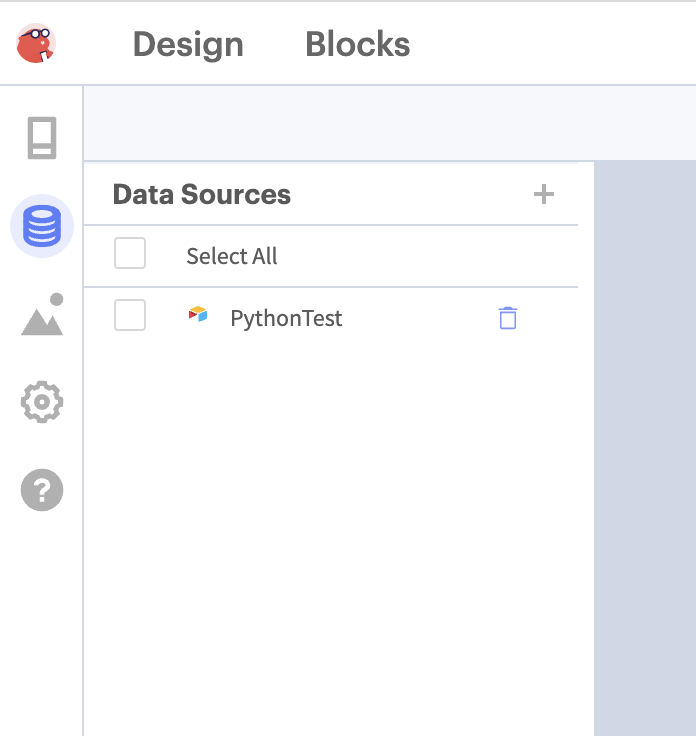
- In the Your Data Sources dialog, click "Create New"
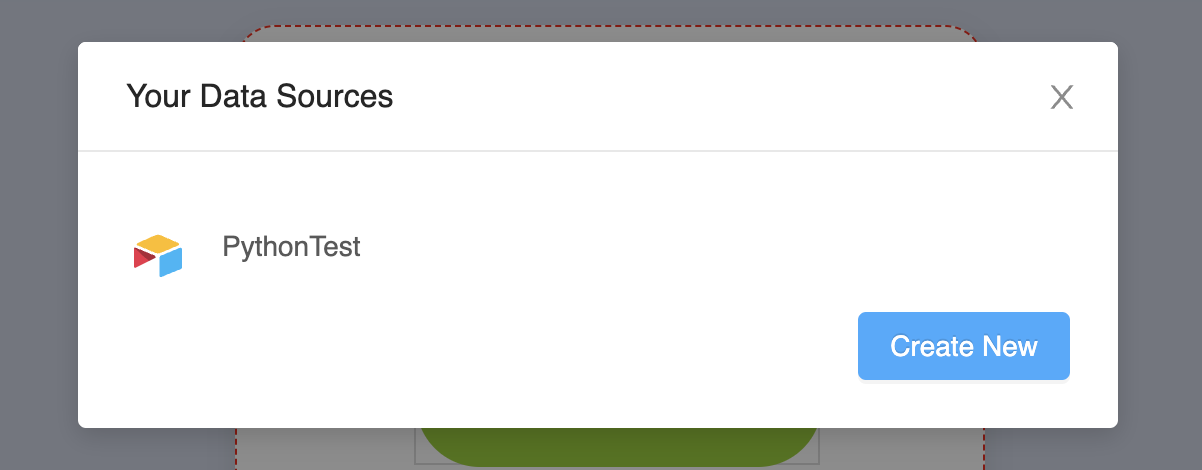
- In the Create New DataSource dialog, click the Airtable icon.

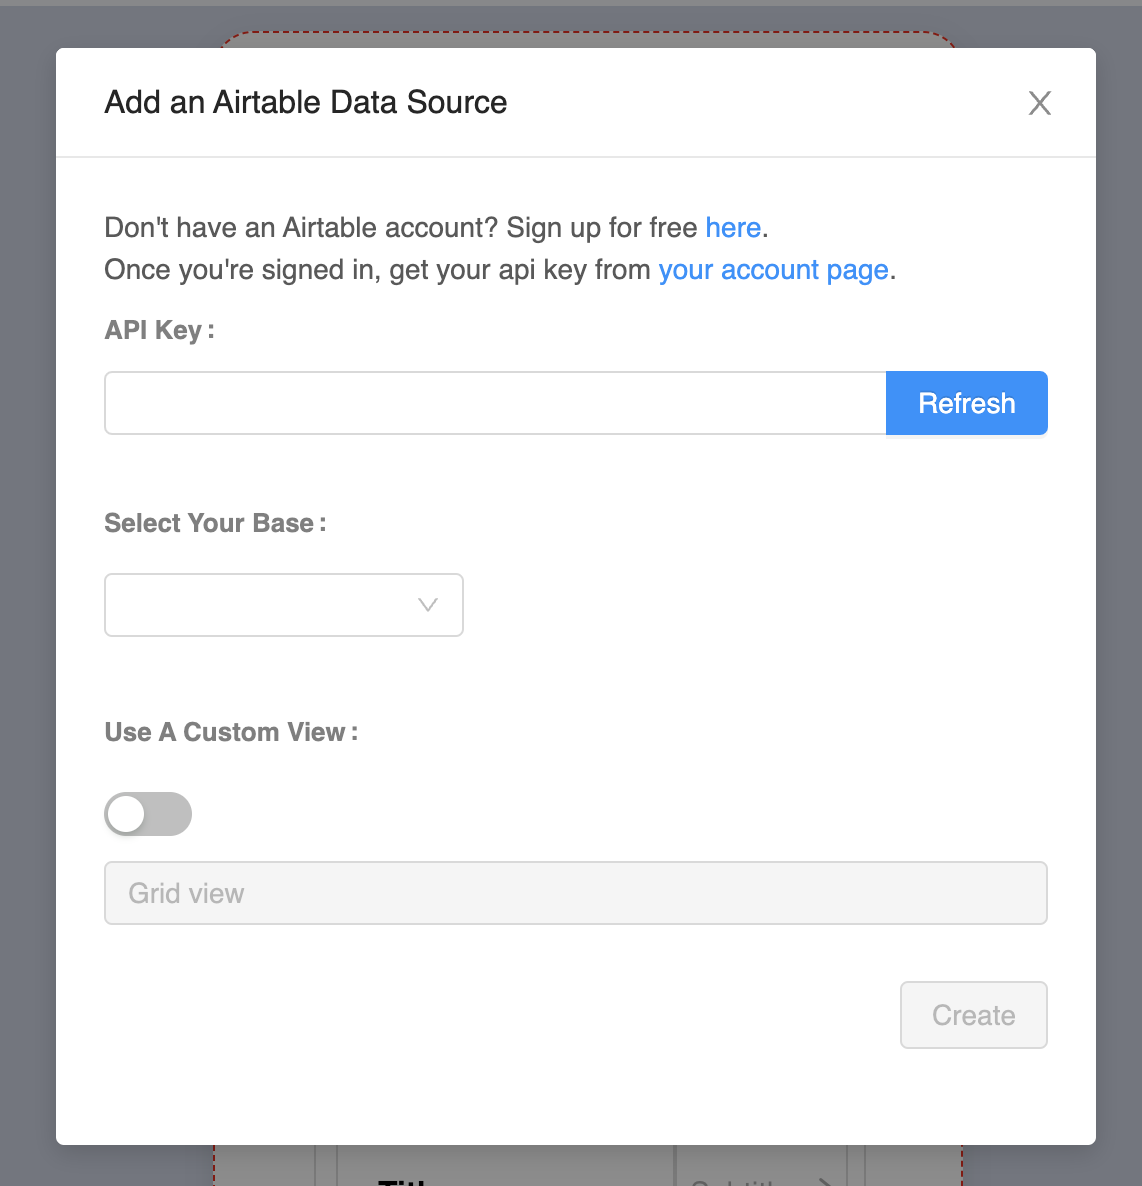
- In the Add An Airtable Data Source dialog, first paste your Airtable API Key (If you do not have your API key, instructions for getting it can be found in the Learning Library lesson "Integrating Airtable with the Python Playground). Once you input your key, click the "Refresh" button. Click the drop-down in the Select Your Base section, and select the base Python Playground Controller. Then confirm by clicking "Create."
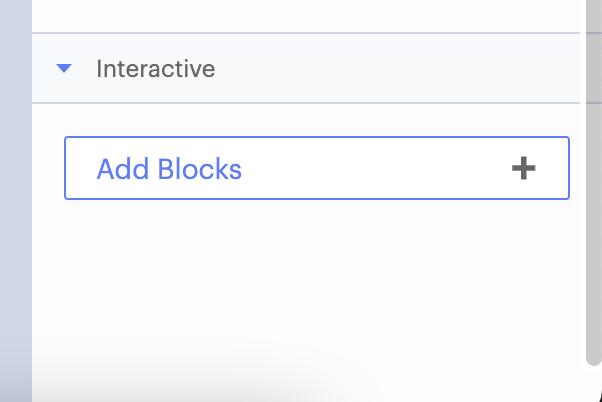
- Next, move to the bottom-right corner and click the button Add Blocks. This will send you to the coding screen.
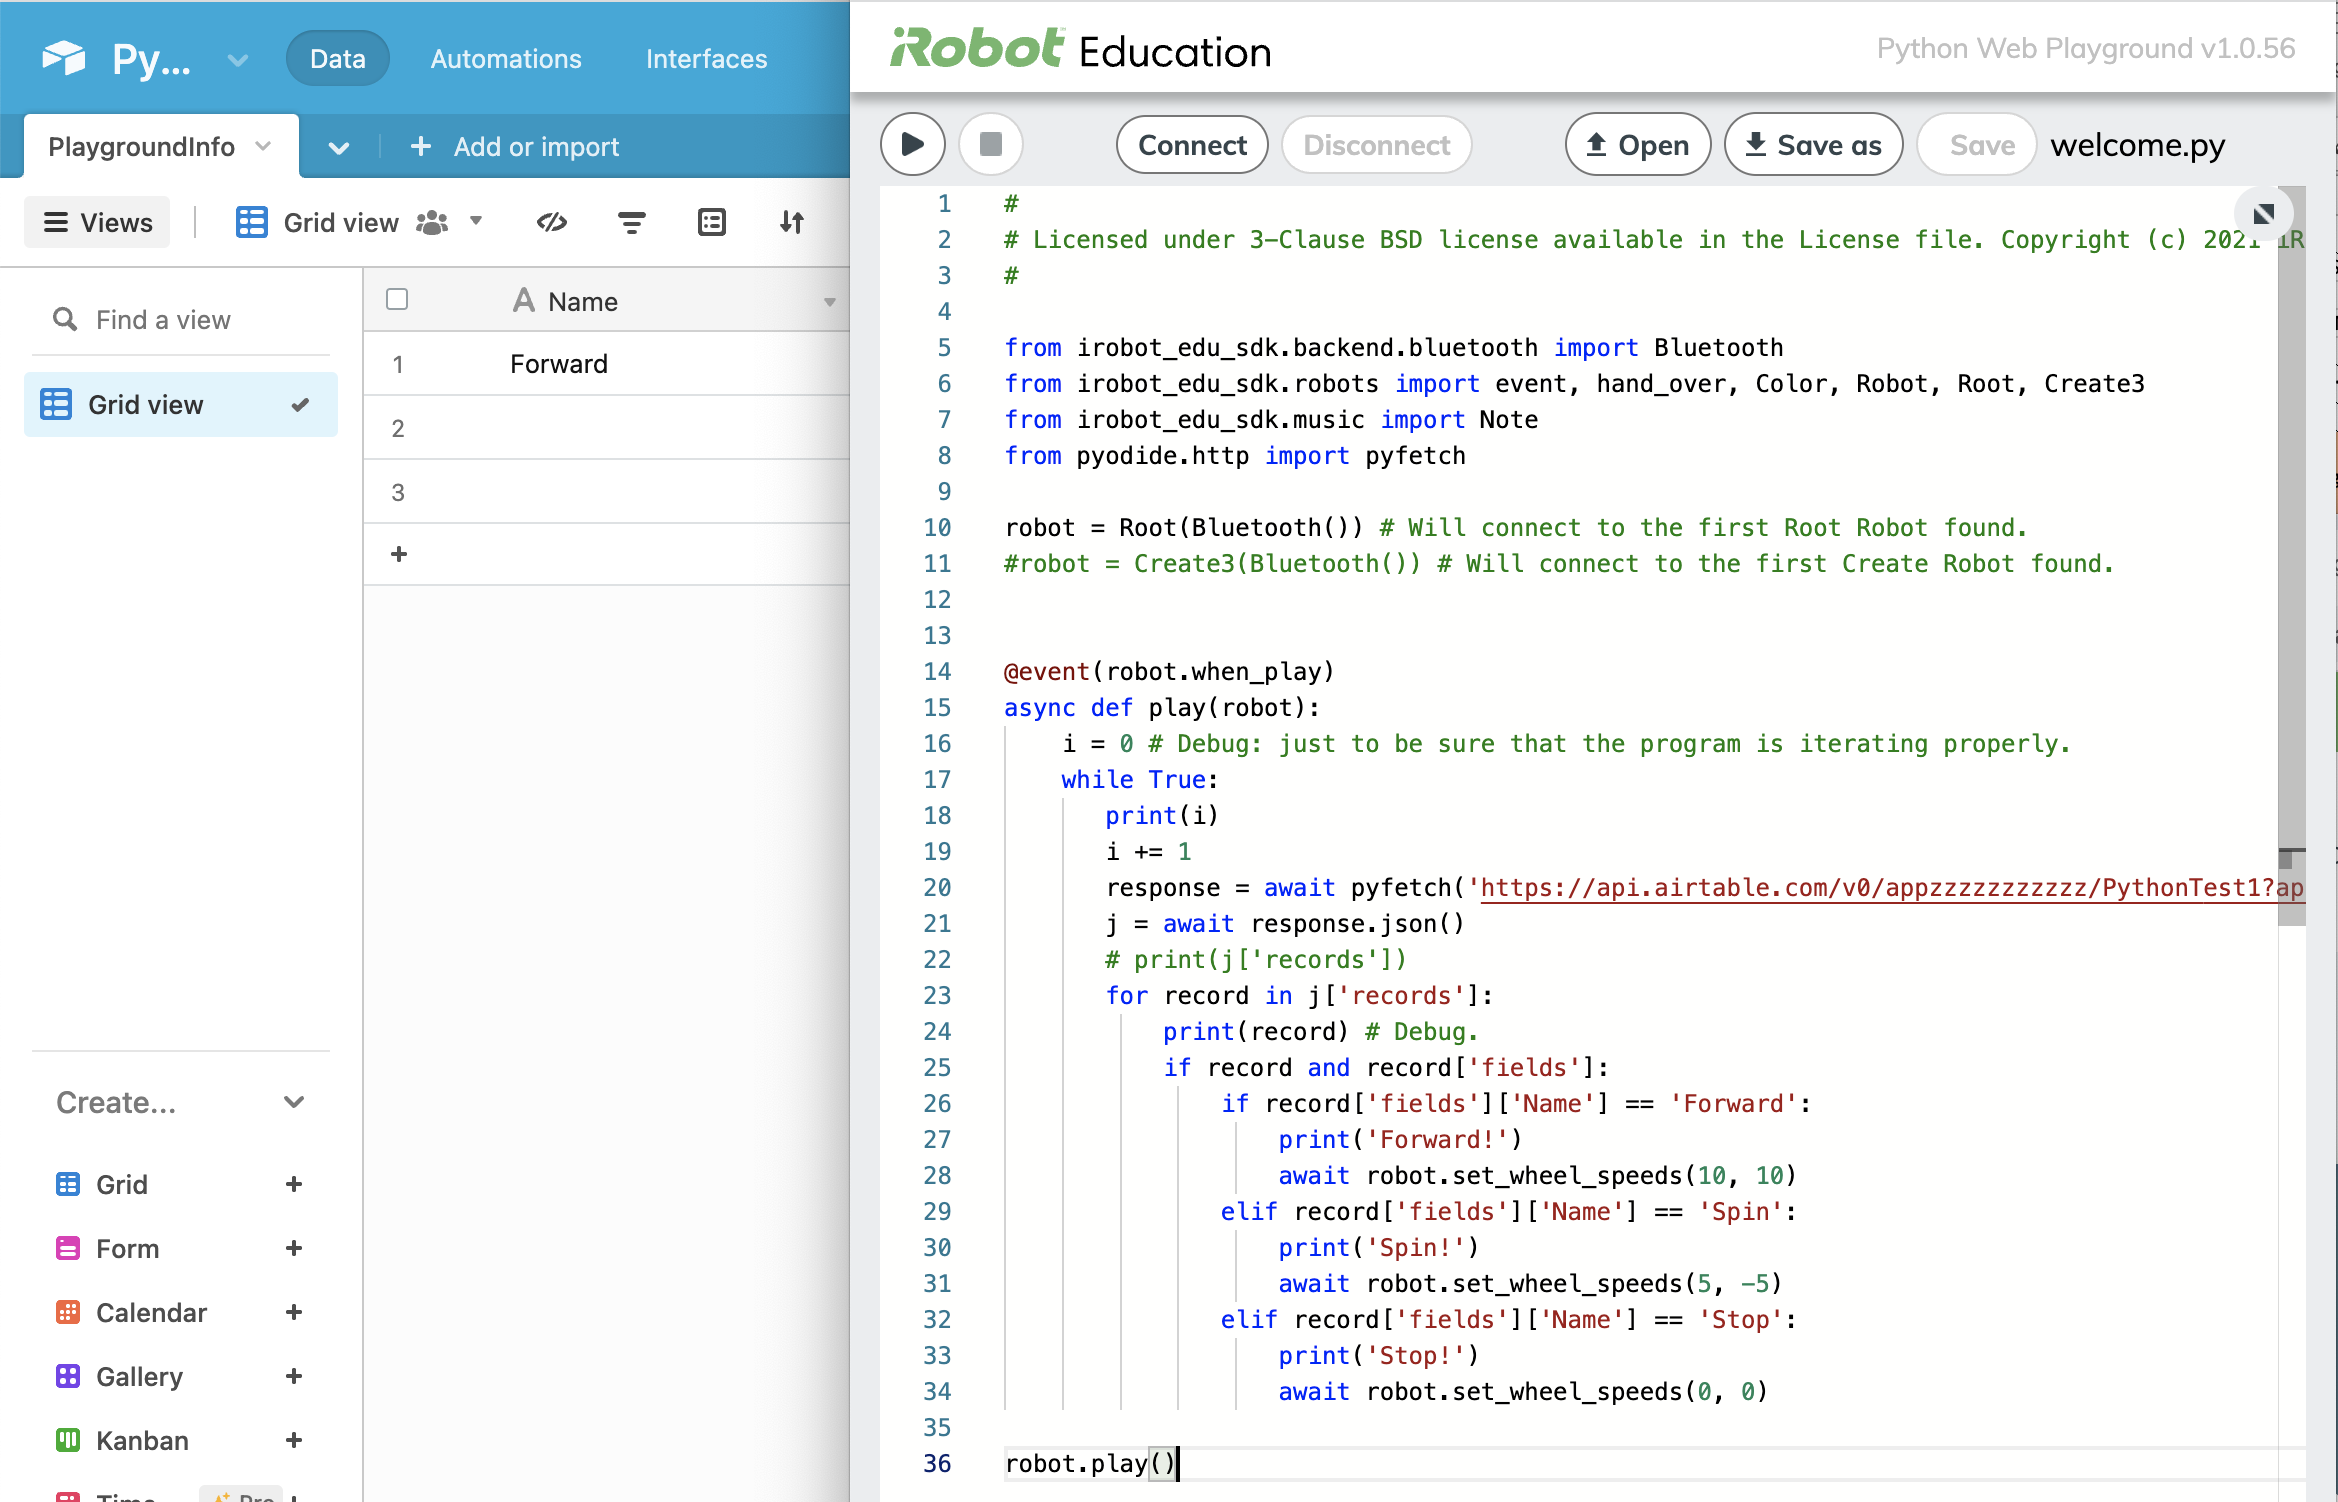
- Next, use the code blocks to create the following program. Make sure that your base name and table name are correct. In the next step, we'll get your row id.
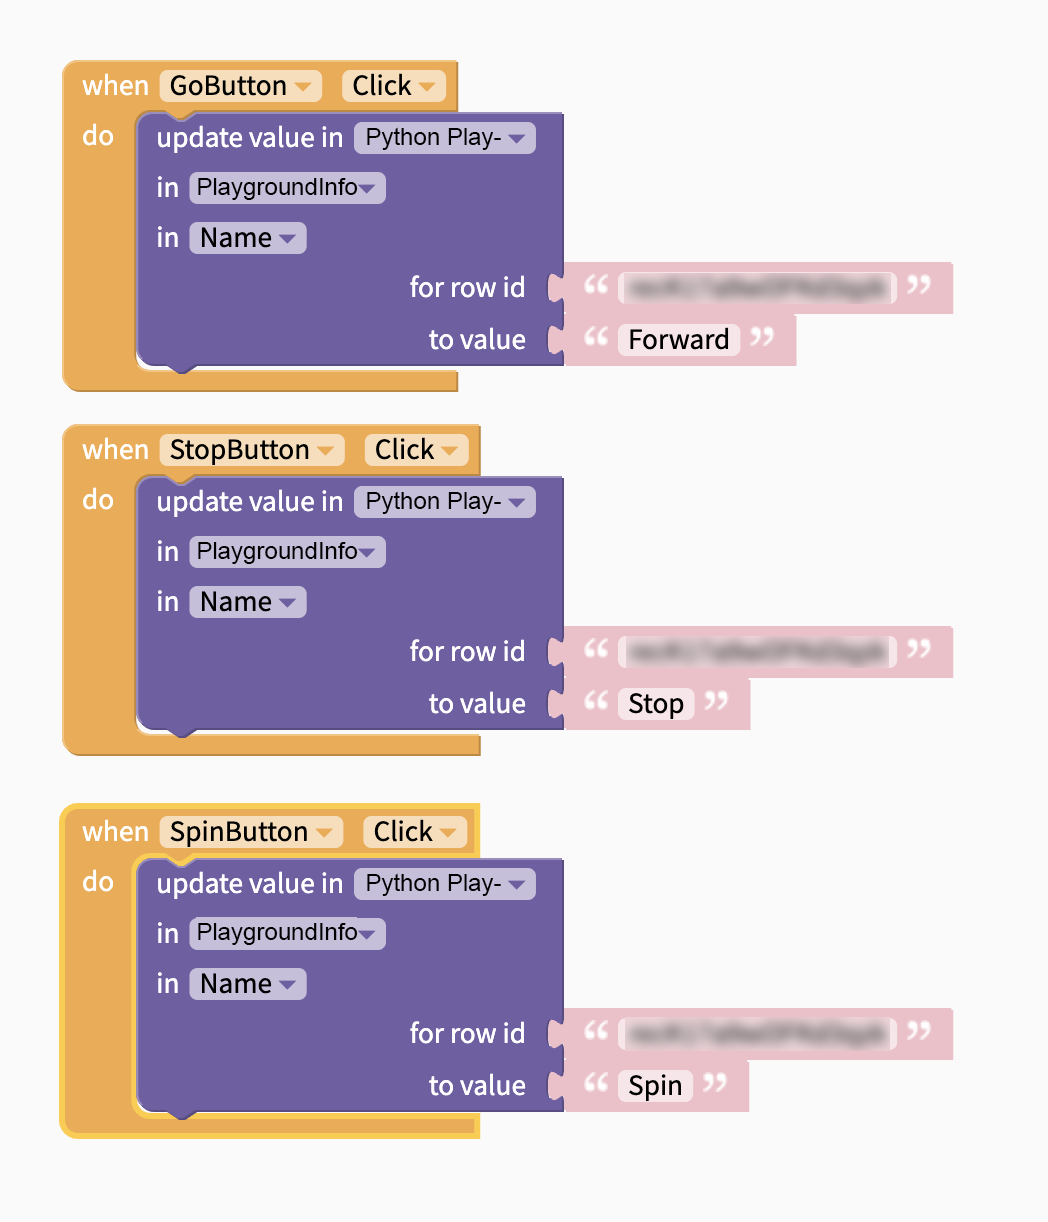
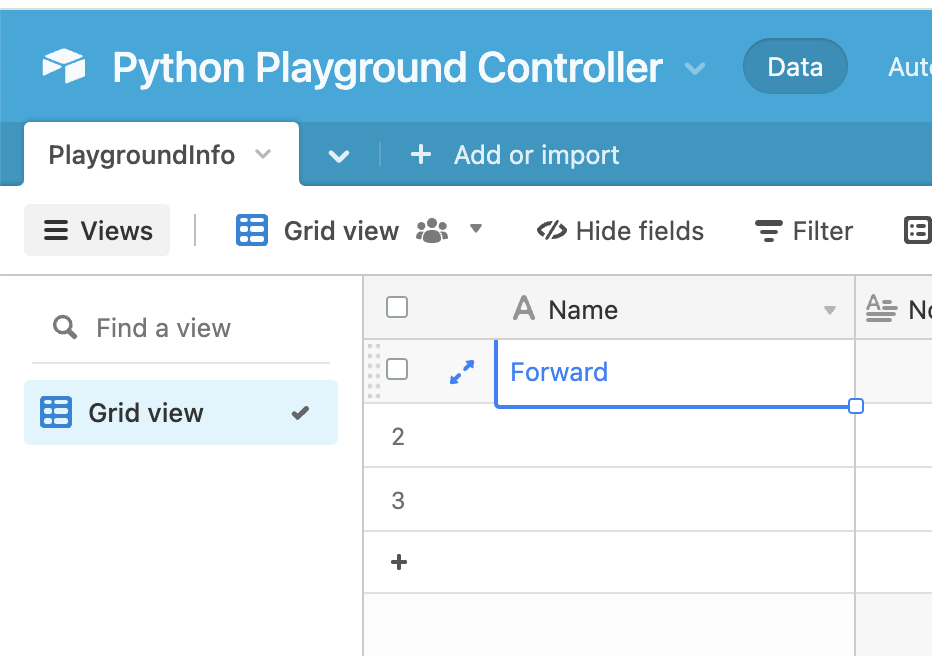
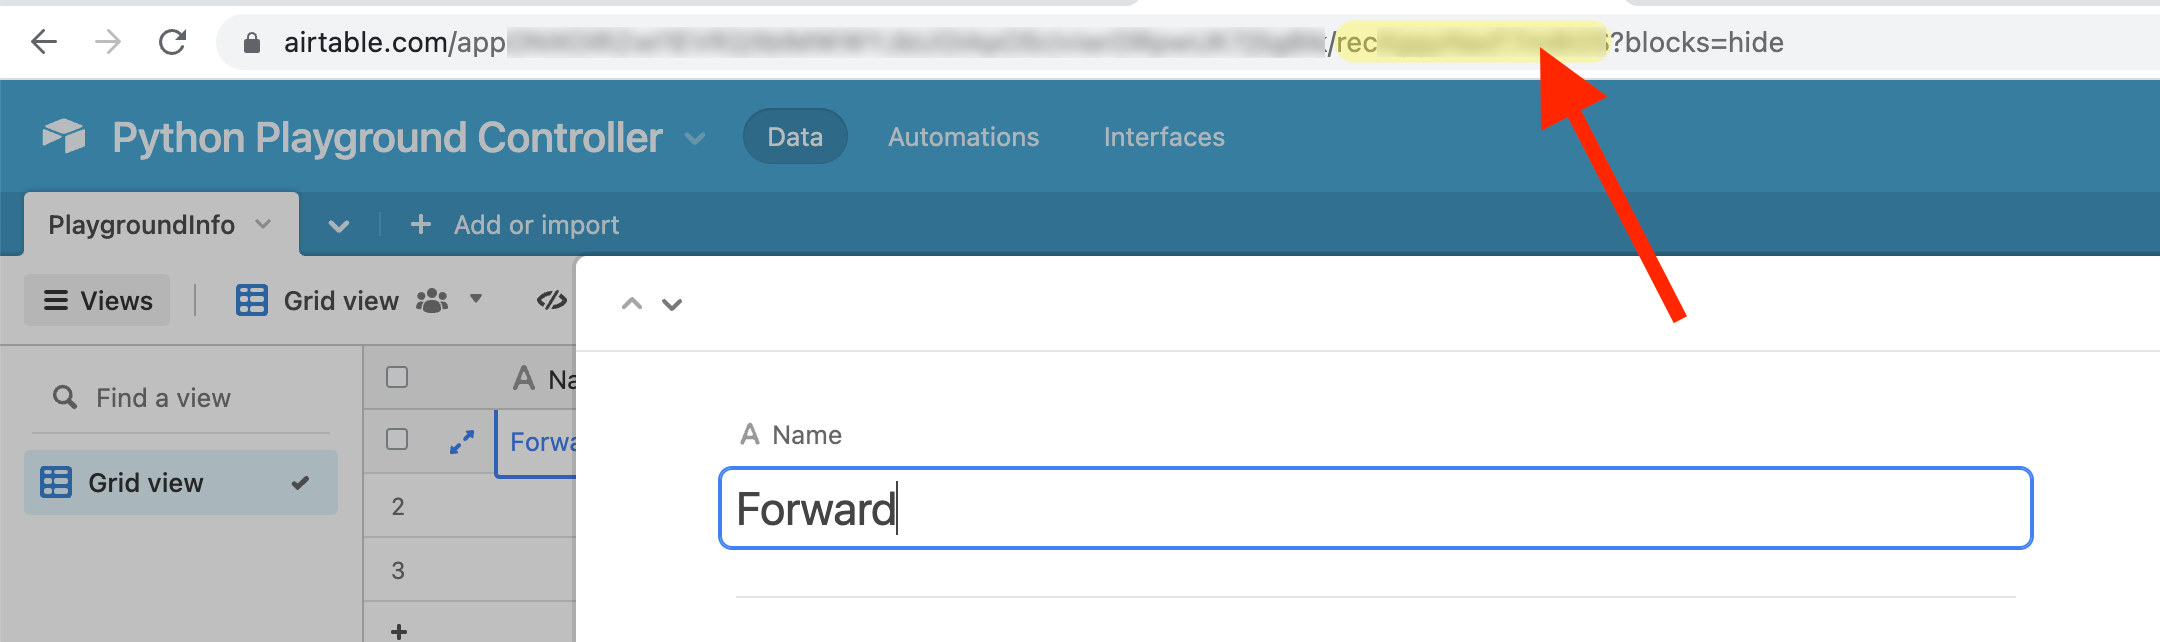
- To get your row id, open your Airtable base. Click on the blue bi-directional arrows next to the word "Forward" to view cell details. Direct your attention to the URL, which should now update to show the cell's URL. At the end of the URL, you'll see a string of text starting with "rec" before a question mark (?). This text is your row id. Copy and paste the row id into your Thunkable code blocks.
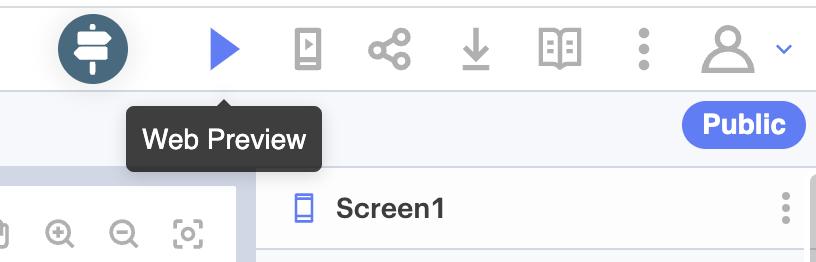
- Once your code is built, navigate to the top-right corner of the screen and press the Web Preview (play) button. This will activate your Thunkable app.
- Open your Airtable base and the Thunkable app side-by-side. Try pressing the buttons on your app to see if the values in cell 1 update to "Forward" "Spin" and "Stop." If they do not update, check that your data source is connected properly and that you are using the correct row id. You can also refer to this Thunkable tutorial for additional help.

Putting It All Together
- Open the Python Playground Project, Airtable base and the Thunkable app together on your screen.
- On the Python Playground page, click Connect to and pair to your robot. If your robot does not show in the dialog, make sure that it is powered on and not already connected via Bluetooth to another device.
- Press "Play" on the Python Playground to run your project. In the Console at the bottom, it should start printing the values of cell 1 in the Airtable base. Try clicking the "Go" button on your Thunkable app to drive your robot forward. If successful, you should be able to control your robot's driving with your Thunkable App!
Going Further
Looking to take your project to the next level? Try some of the following ideas!
- Use some of Airtable's other integrations (or a service like Zapier!) to connect it to other smart devices in your home. Can you build an app that controls your robot with your smart doorbell or the weather?
- Connect your Alexa to Thunkable to control your robot with your voice!
- Experiment with image recognition to drive your robot around with smiles and frowns!